

Sometimes you might want to try changing the display settings on your computer, for better readability, less strain, or other reasons. However, there is no guarantee that the results will be what you want, and if you do not know how to restore your display settings to their default state, you may end up stuck with a weird screen resolution, inaccurate colors, or an unreadable font size.
Alternatively, you may be experiencing problems with the display on your Windows 11 PC, and are searching for a solution that might help fix them. If that's the case, we're going to explain how you can reset your display settings in Windows 11 here. The process is quite simple and does not take much time. So, let's get down to it!
Reset the Display Resolution
If you find various elements on your Windows 11 PC to be too big or small or are not clear enough, the most likely cause is that the display resolution is not correct for your screen. The best solution in this case is to reset the resolution to the one recommended by the OS.
- Open the Settings app and click on the 'System' option on the left.
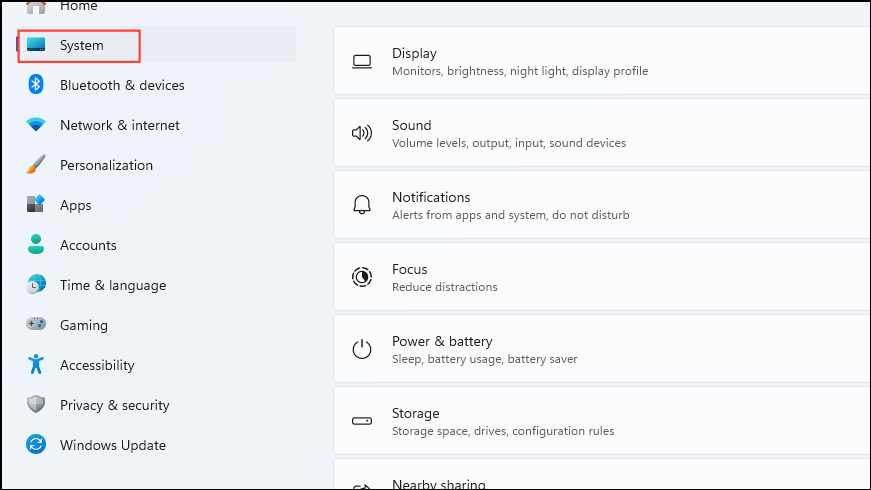
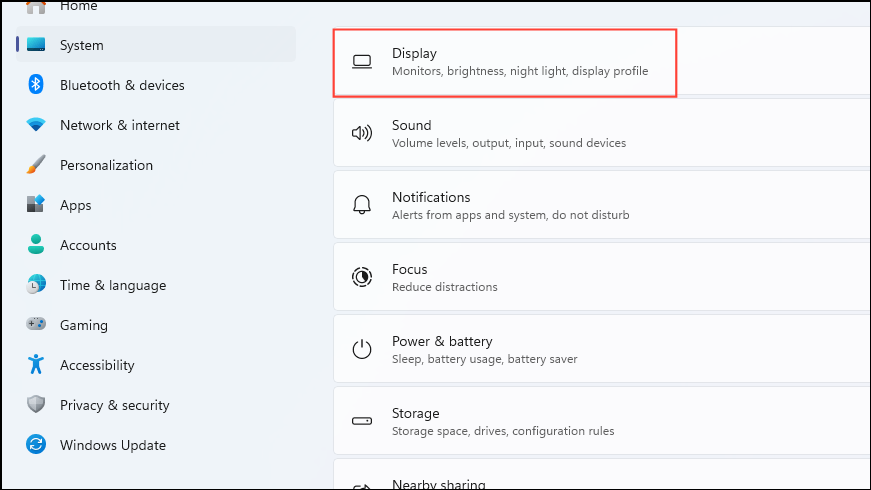
- Click on the 'Display' option that appears on the right to access all display-related settings.
- On the next page, scroll down to the 'Scale and Layout' section and click on the drop-down menu to the right of the 'Display Resolution' option. Select the resolution recommended by the system by clicking on it.
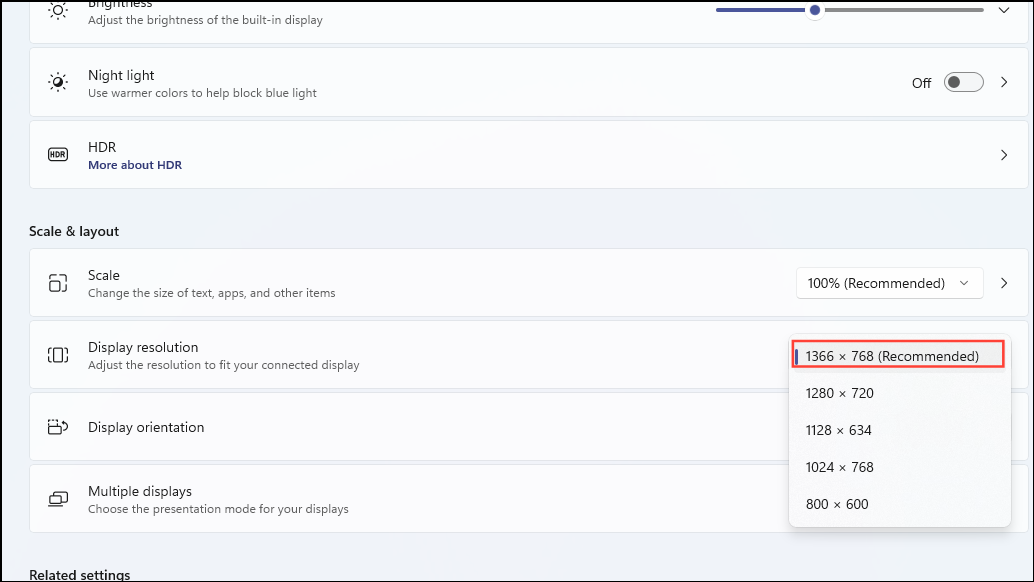
Now the various objects on your screen, such as icons and text should appear properly.
Win + Ctrl + Shift + B. Wait until the screen flickers once and then try changing the resolution again.Reset the Scaling Settings
Besides the display resolution, the scaling settings can affect how large or small various items appear on the screen. You can try resetting those if resetting the resolution does not work.
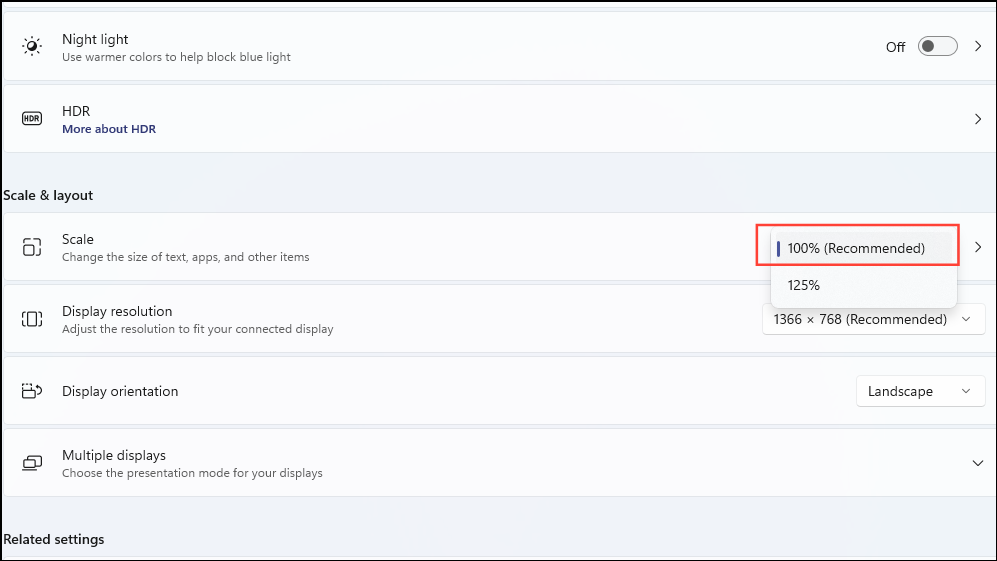
- On the Display page in the Settings app, scroll down to the 'Scale and Layout' section.
- Click on the drop-down menu to the right of the 'Scale' option and set it to the recommended setting, which may be 100% or 125%, depending on your hardware.
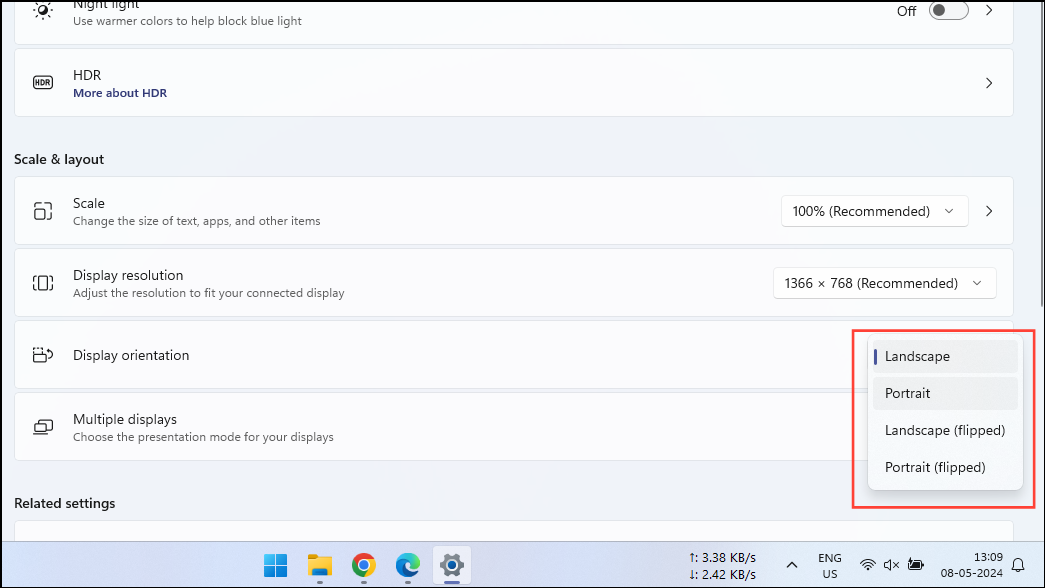
Reset the Display Orientation
Windows 11 lets you change your screen rotation, which can be quite handy if you have a rotating monitor. However, if your display gets stuck in the wrong orientation, it can cause problems. You can fix this by following these steps.
- Open the Display Settings and scroll down to the 'Scale and Layout' section.
- Click on the drop-down menu to the right of the 'Display Orientation' option and select the setting that matches your display orientation.
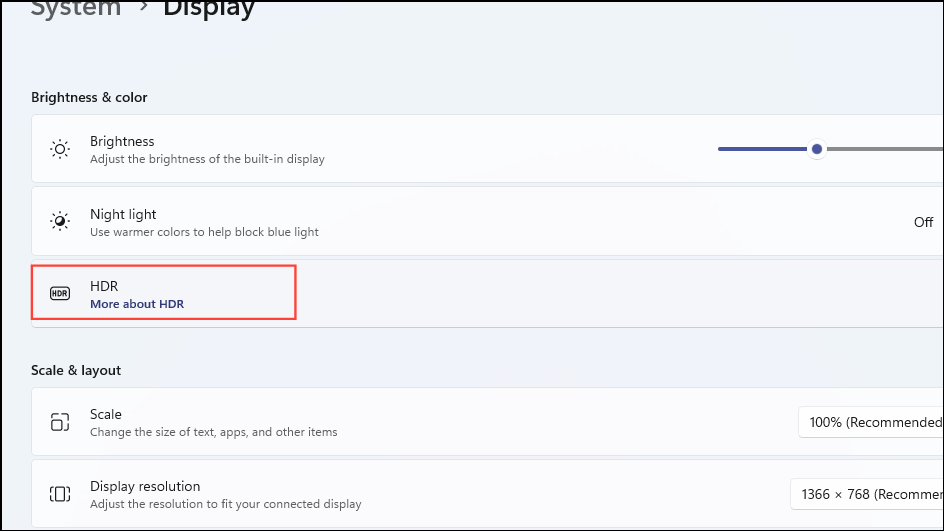
Reset HDR Calibration
If you have a monitor that supports HDR, you may have calibrated it and made adjustments for better performance, but have not seen the expected results. In such a situation, we recommend resetting the screen before trying to calibrate it again.
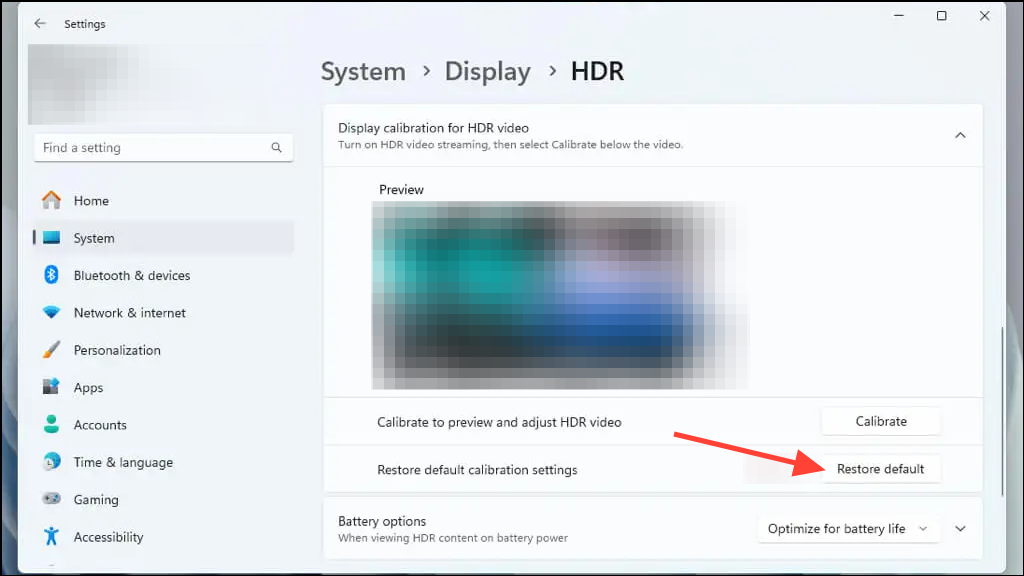
- Open the Display page in the Settings app and click on the 'HDR' option.
- Click on the 'Restore Default' button on the right of the 'Restore Default Calibration Settings' option.
Reset Night Light Settings
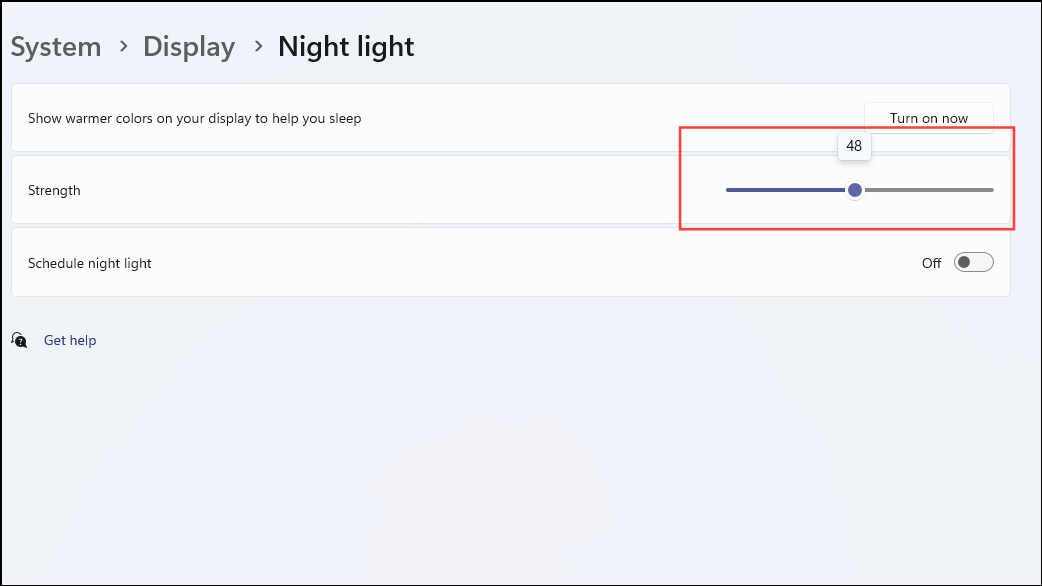
Night Light is a very useful feature that reduces the blue light emanating from your display, which can help reduce eye strain and improve sleep. That said, if you've adjusted the strength of the filter to an extremely high or low level, it can affect how colors appear on the screen. Here is how you can reset it.
- Open the Display page in the Settings app and click on the 'Night Light' option.
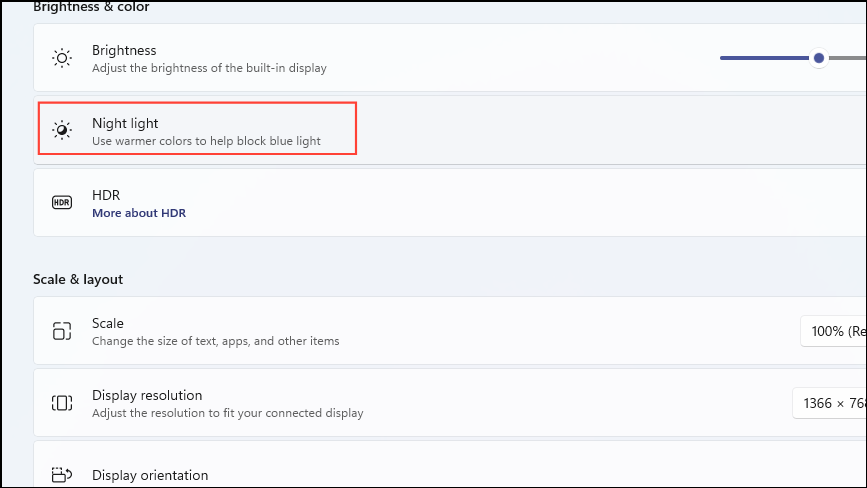
- Move the slider that adjusts the strength of the filter to a value somewhere close to the middle, such as 48.
Reset the OS Colors
Windows lets you easily customize how the OS appears and feels by adjusting the colors, borders, accents, etc. If you're running into display-related problems, a possible solution is to reset the OS colors to their default settings.
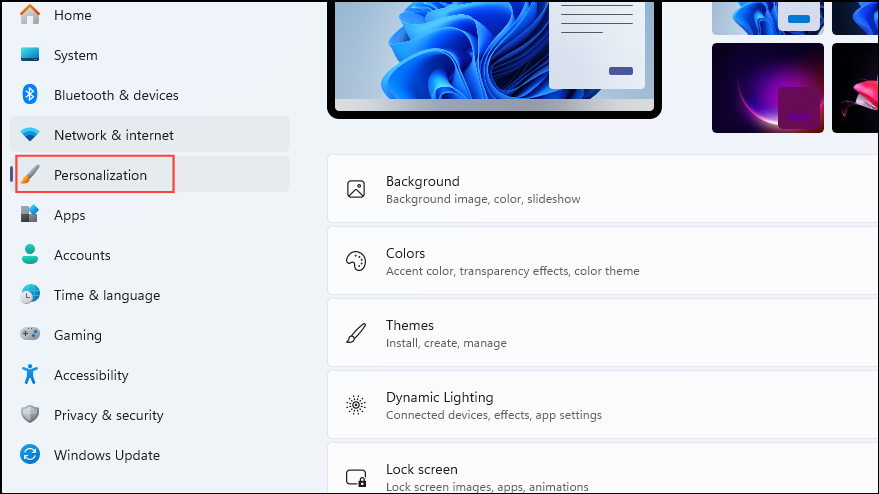
- Open the Settings app and click on the 'Personalization' option on the left.
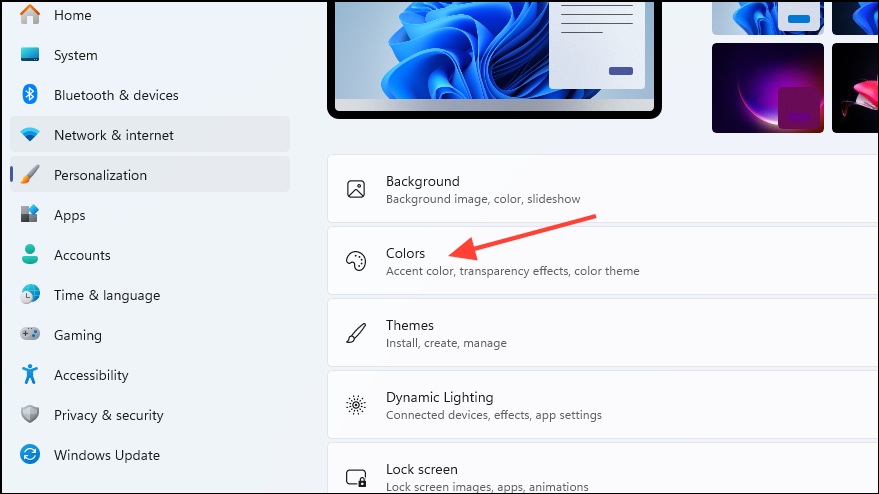
- Next, click on the 'Colors' option.
- Use the drop-down menu on the right of the 'Choose Your Mode' option to select 'Light'.
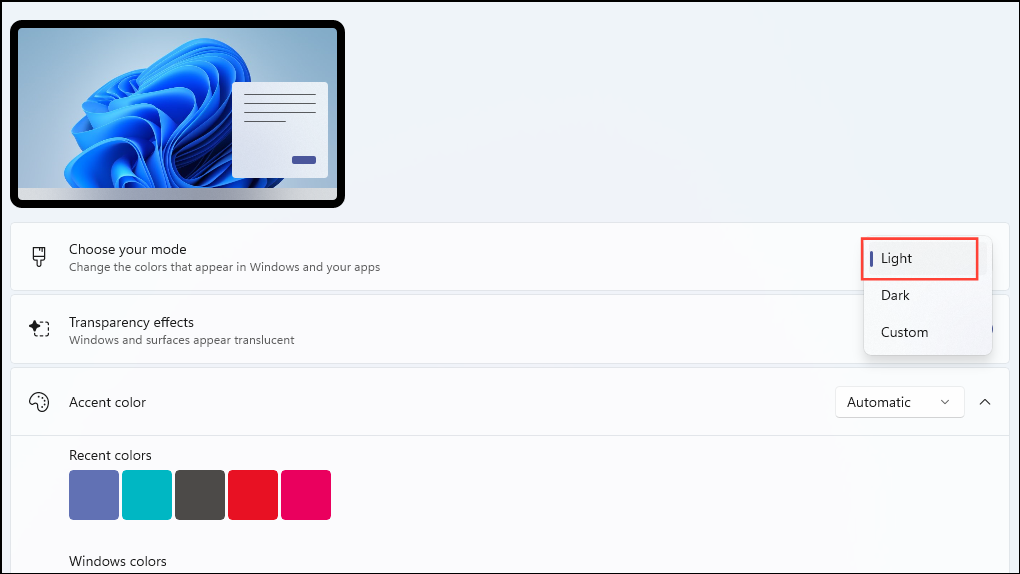
- Make sure 'Transparency Effects' are enabled. If they are not, click on the button on the right to turn them on. And turn the 'Accent Color' option to 'Manual'.
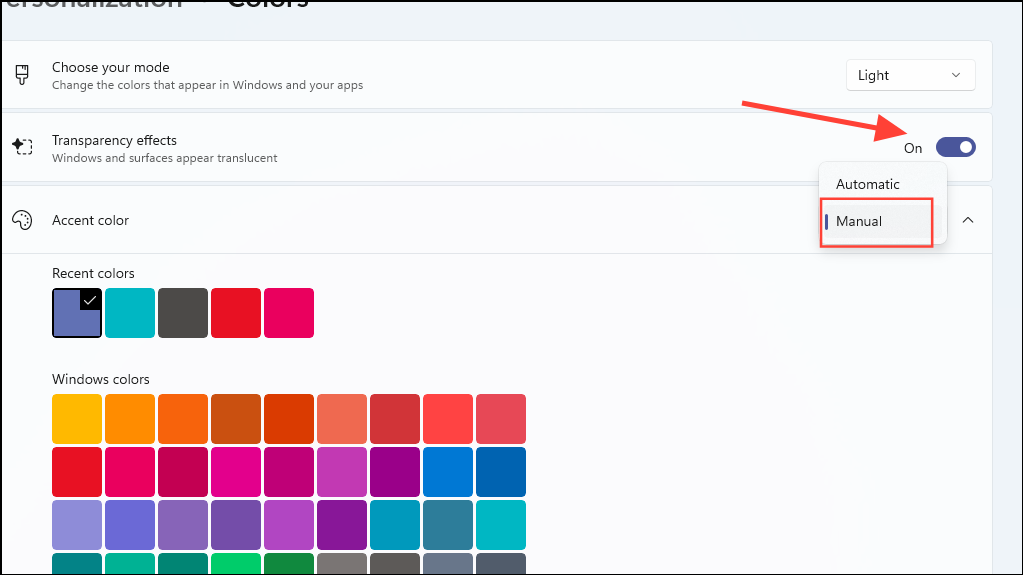
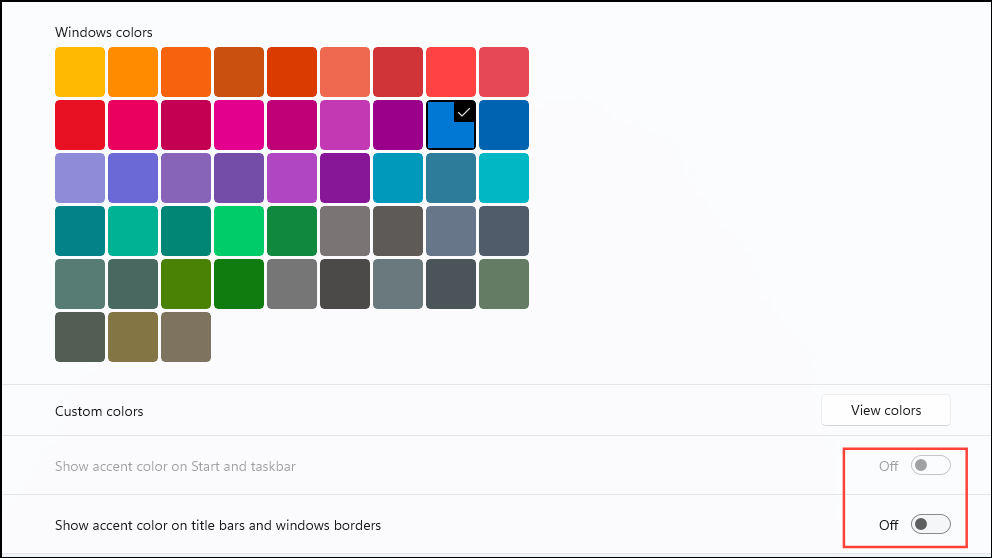
- After setting the Accent Color to 'Manual', select Blue from 'Windows Colors'. Scroll down and make sure the 'Show Accent Color On Start And Taskbar' is disabled.
If it is not, click on the button on the right and turn it off. Do the same for 'Show Accent Color On Title Bars And Window Borders'.
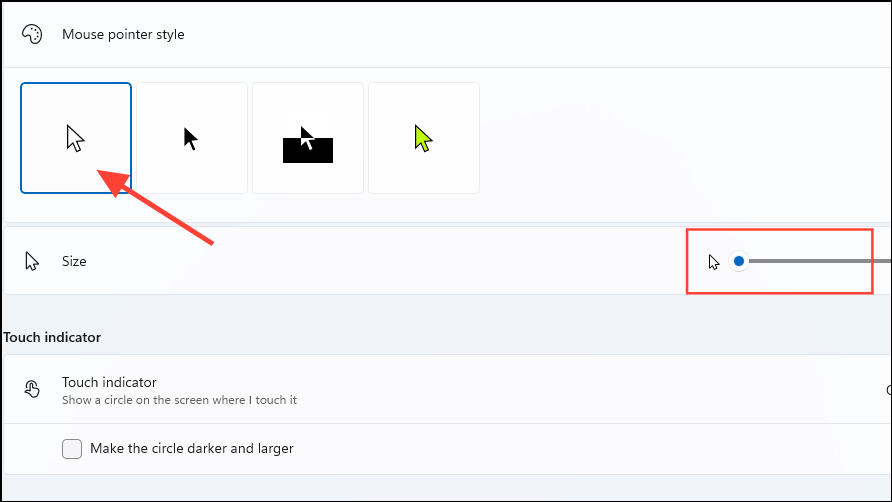
Reset the Mouse Pointer
Your mouse pointer may appear to be too large, in a different color, or even both. To fix this issue, you will need to go to accessibility settings.
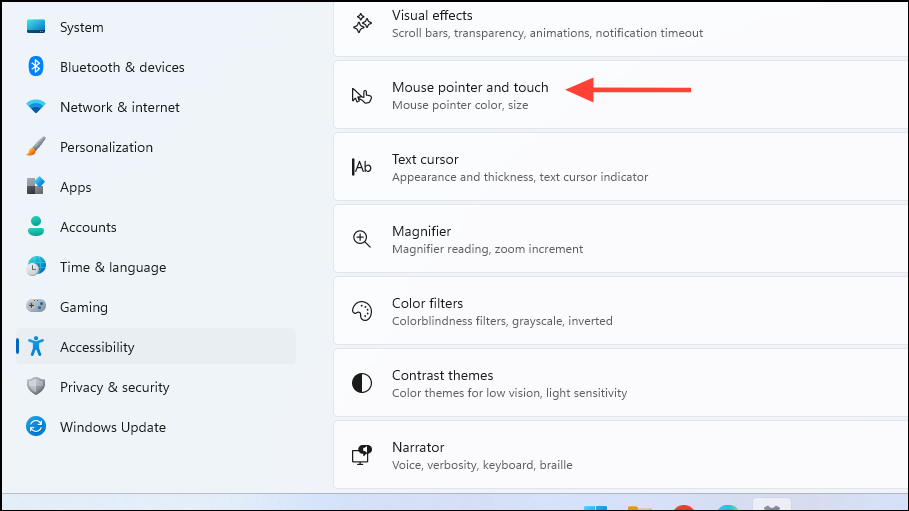
- Open the Settings app and click on the Accessibility option on the left.
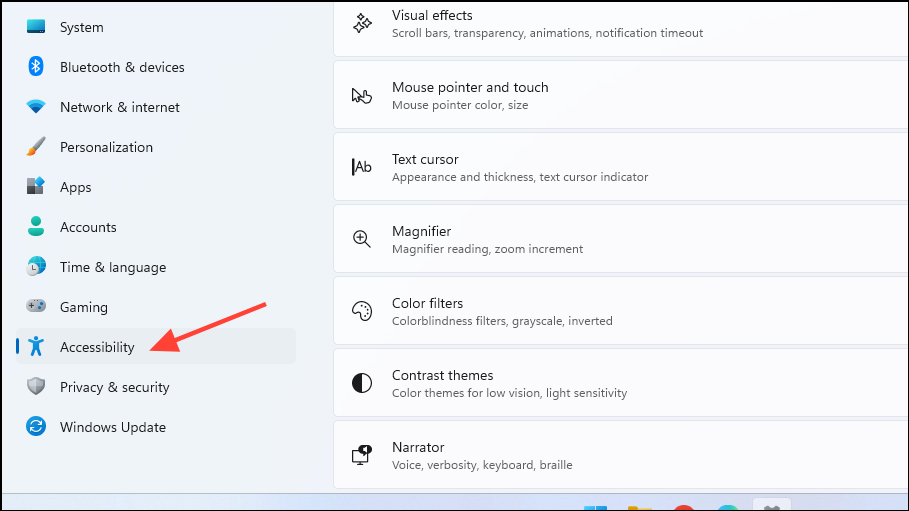
- On the Accessibility page, click on the 'Mouse Pointer and Touch' option.
- Click on the white mouse pointer icon and drag the slider to the left.
Turn Off Color Filters
Windows offers several color filters that can affect how various UI elements appear on the screen. You can disable them if you prefer the default appearance of the OS.
- On the Accessibility page of the Settings app, click on the 'Color Filters' option.
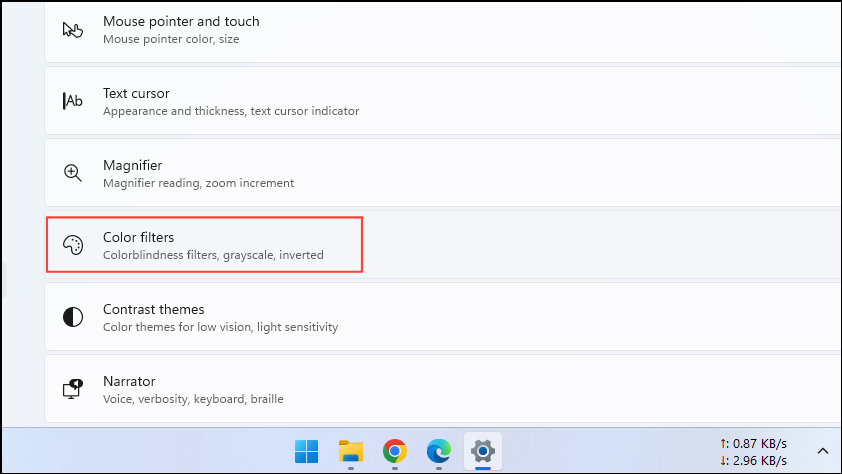
- Click on the button to the right of the 'Color Filters' option to turn it off.

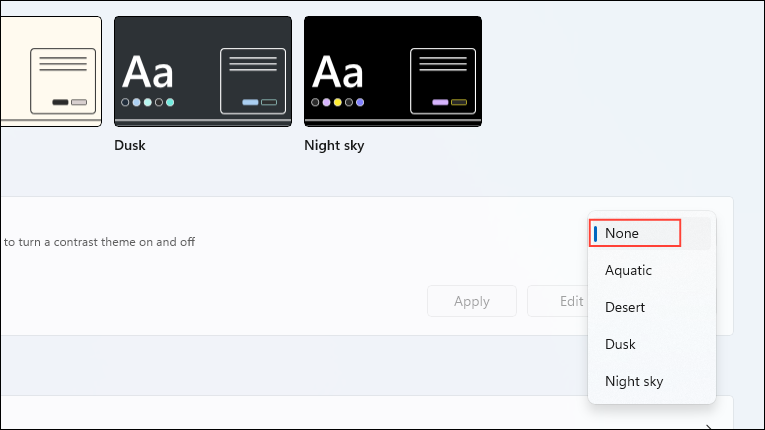
Turn Off Contrast Themes
Windows comes with a few contrast themes that are designed to ensure that icons and text are more easily readable and understandable. However, you can set the default theme if you prefer it.
- Click on the 'Contrast Themes' option on the Accessibility page in the Settings app.
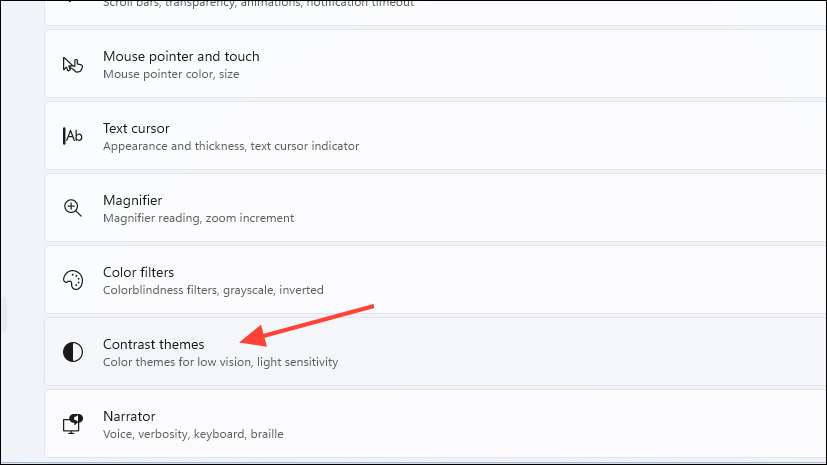
- When the 'Contrast Themes' page opens, click on the drop-down menu and select 'None'.
Reset Windows Themes
Themes include several components that affect how Windows appears, such as the desktop background, color effects, etc. Depending on the theme you have applied, it can be a bit distracting, so you can reset it to the default theme.
- Open the Settings app and click on the 'Personalization' section.
- Click on the 'Themes' option.
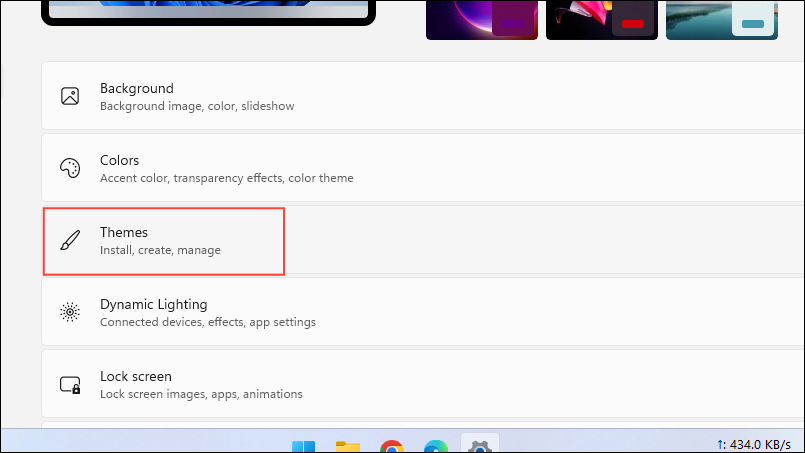
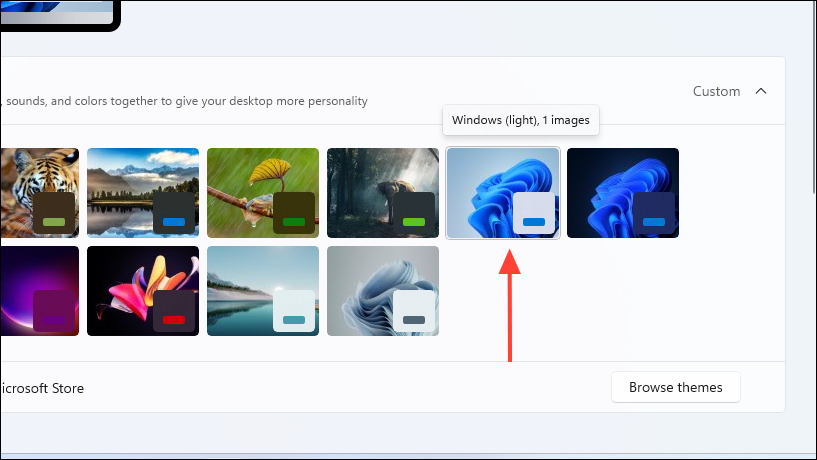
- You will see all the themes you have installed and those that come preinstalled with Windows. Click on the 'Windows Light' theme to select it.
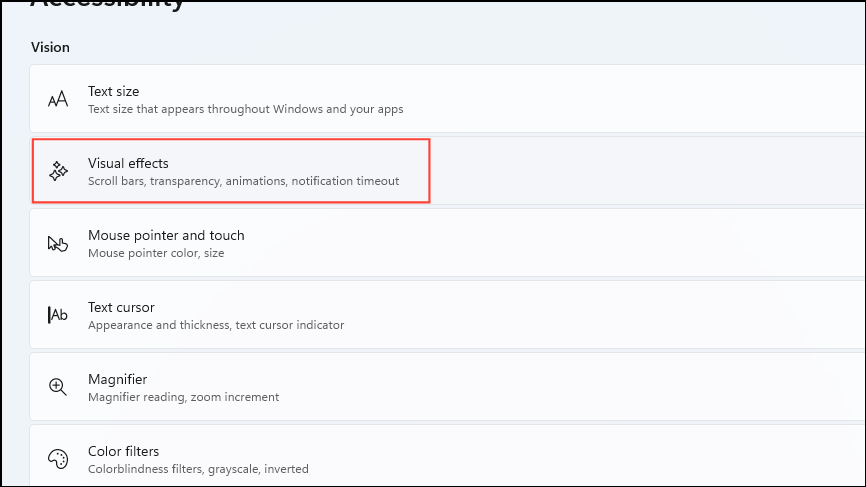
Reset Visual Effects
Animation effects in Windows can make the user experience more enjoyable as they can make interactions more fluid. If you have made any changes to the visual effects, you can reset them to their default setting.
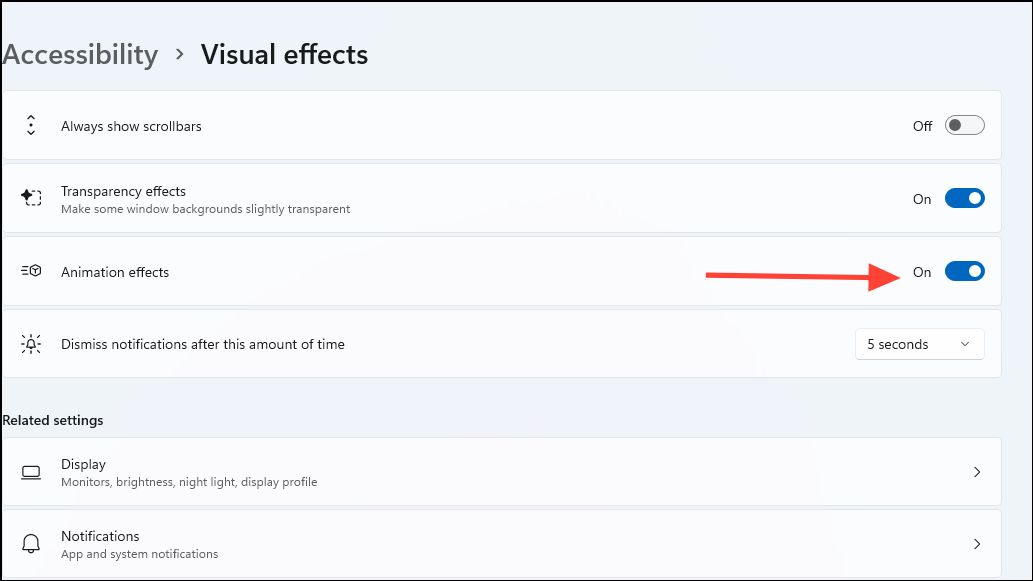
- On the Accessibility page of the Settings app, click on the 'Visual Effects' option.
- Click on the button next to the 'Animation Effects' option and turn it on.
Restore Default Color Display Settings
Windows 11's color management settings let you create different color profiles for different use cases, but creating complex profiles can adversely affect your user experience. To avoid that, you can restore the default display color settings using these steps.
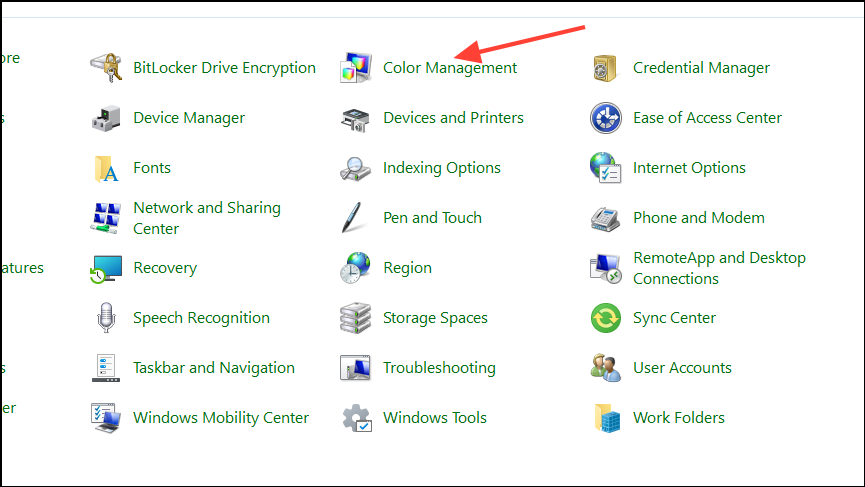
- Open the Control Panel and click on the 'Color Management' option.
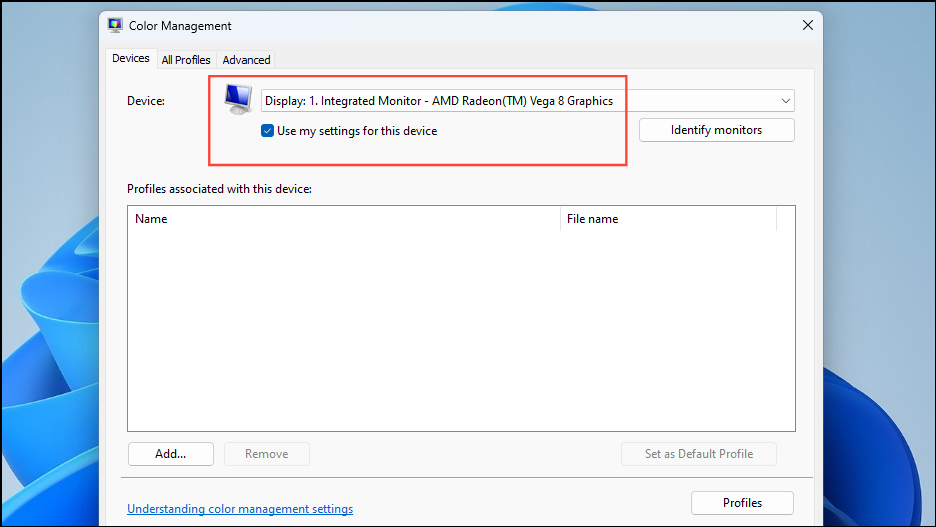
- In the Color Management window, on the 'Devices' tab, select your display from the drop-down menu at the top and check the 'Use My Settings For This Device' option.
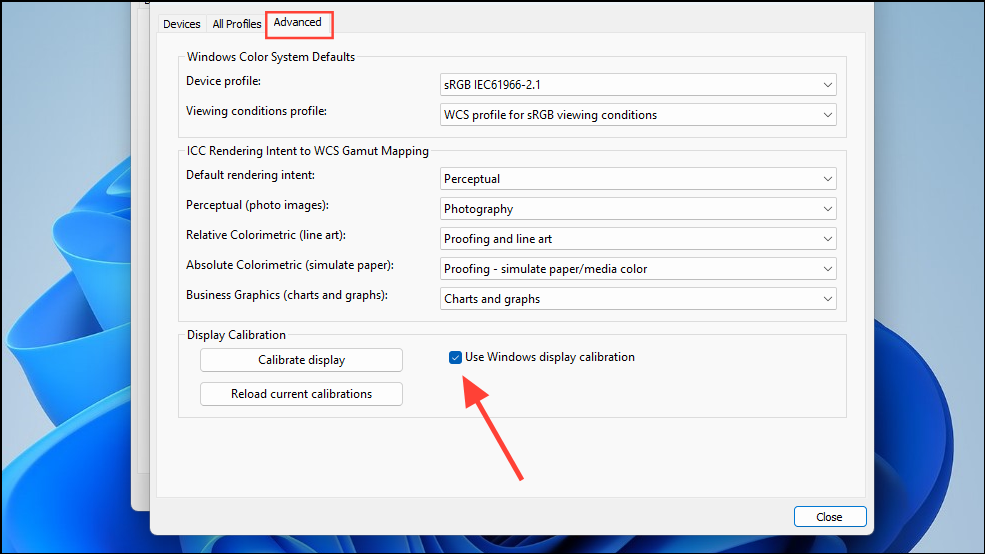
- Now, click on the 'Advanced' tab at the top and then the 'Change System Defaults' button at the bottom.

- Click on the 'Advanced' tab again in the box that appears and check the option 'Use Windows Color Calibration', before clicking on the 'Close' button.
Reset the Text Color
If you have changed the text color on your Windows 11 computer but are unhappy with the results, you can change it back using the Registry Editor.
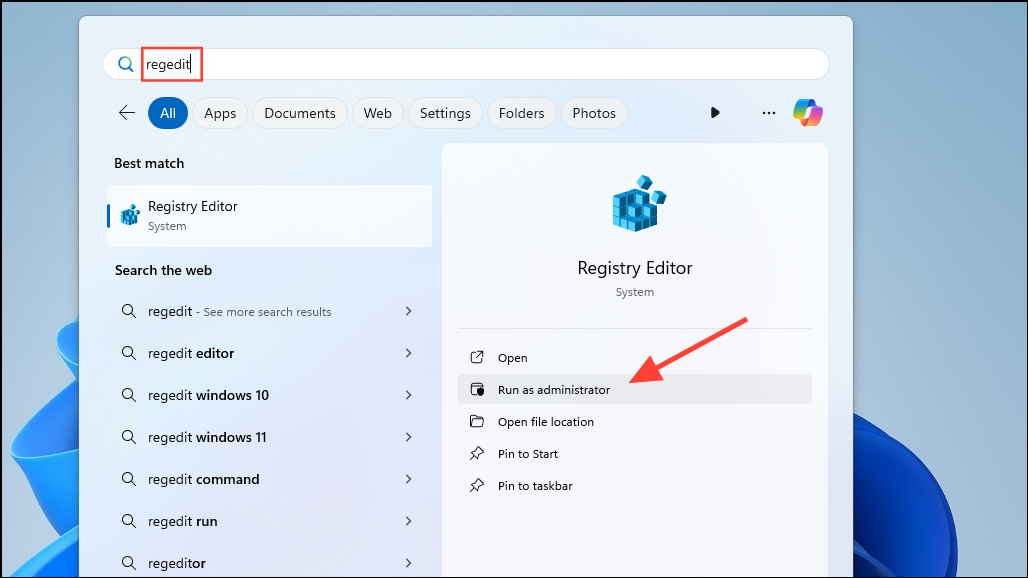
- Open the Start menu, type
regeditand click on the 'Run As Administrator' option.
- When the Registry Editor opens up, navigate to the following address:
Computer\HKEY_CURRENT_USER\Control Panel\Colors.
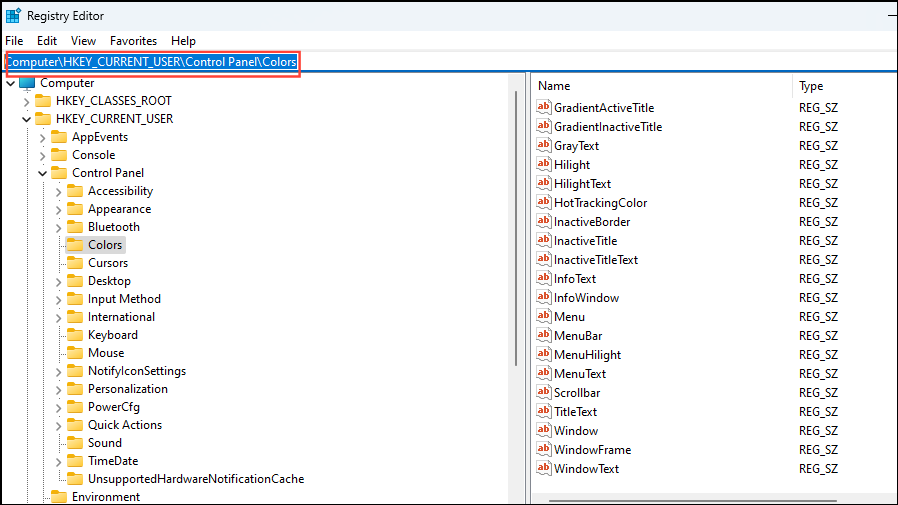
- On the right side, scroll down and double-click on the 'WindowText' entry. Type
000and click on the 'OK' button to save it.
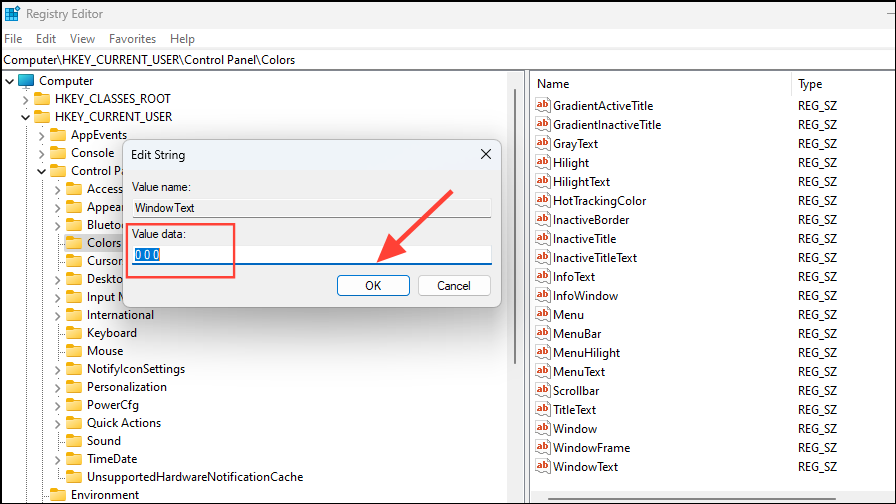
255 255 255.Restore the Default Text Size
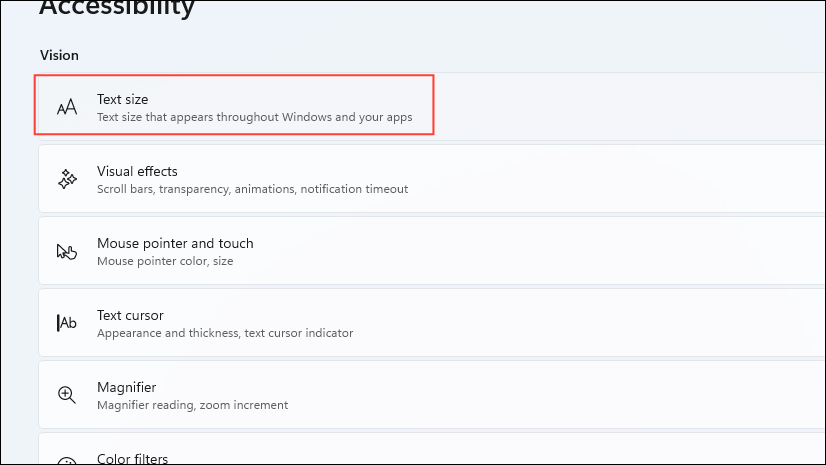
You can also restore the text size to its default setting from the accessibility settings.
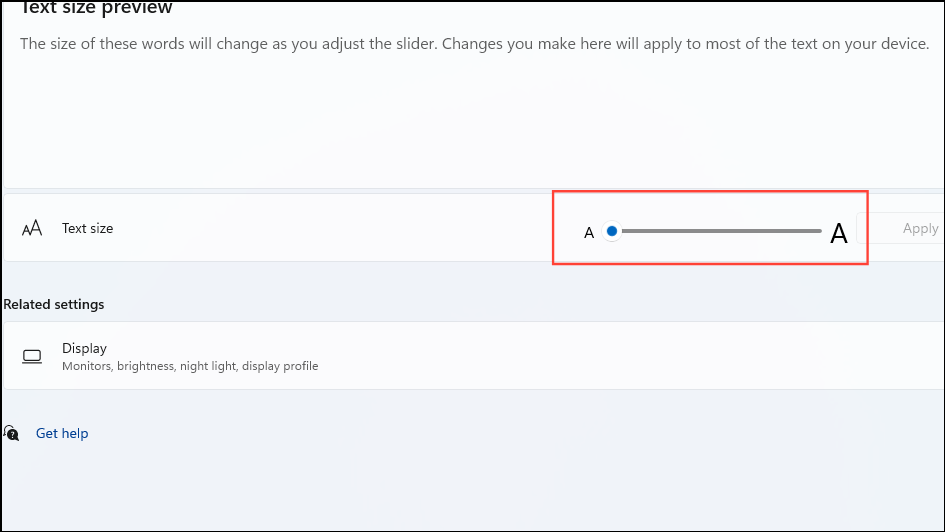
- Click on the 'Text Size' option on the Accessibility page in the Settings app.
- Move the 'Text Size' slider to the left to restore it to the default size.
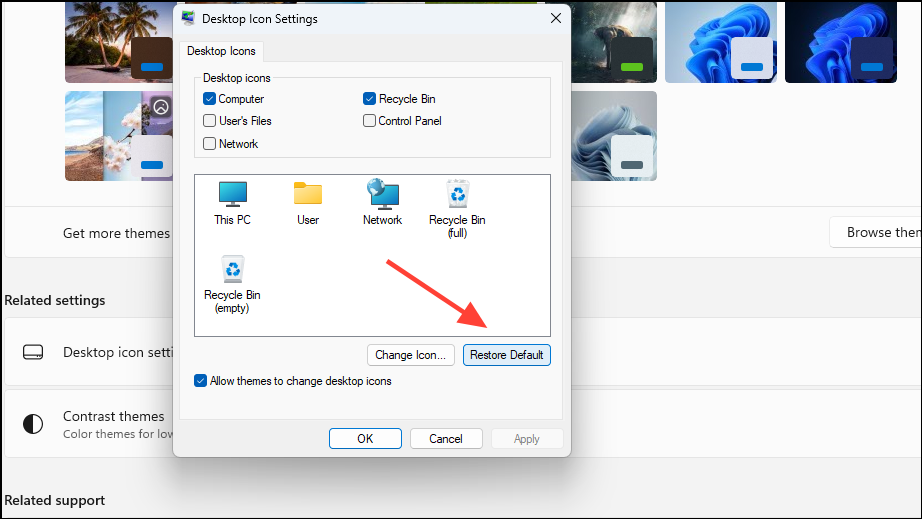
Restore Default Icons
If you have installed custom icons but want to restore the default look of your desktop, here are the steps.
- Open the 'Personalization' section in the Settings app.
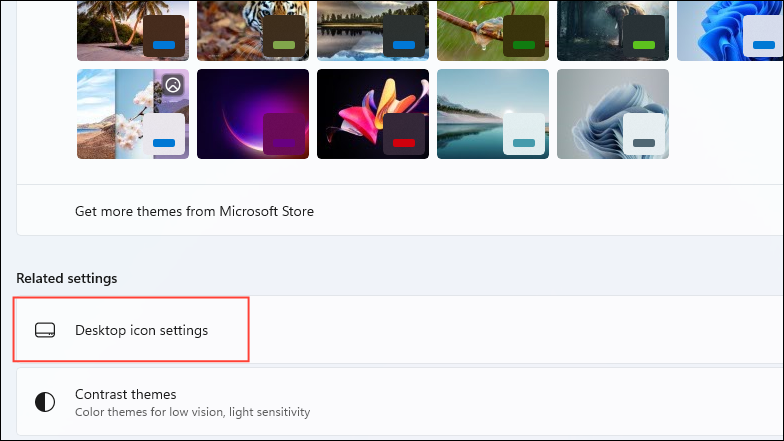
- Click on the 'Themes' option and scroll down to the 'Desktop Icon Settings'.
- Select the icons you want to restore, and click on the 'Restore Default' button before clicking on the 'OK' button.
With the above methods, you can choose to reset individual components that affect your Windows 11 display and restore it to its default settings. From the colors to the orientation and even the scale, everything can be reset to its original state. These can be very useful if you've changed certain settings and do not like how things appear on your screen.
Keep in mind that the availability of certain settings depends on your hardware, such as HDR-related ones. You may not be able to change them, but most of these settings should be available on the majority of PCs running Windows 11.


Member discussion